
READY TO TRANSFORM YOUR SPACE? 🚀 You’ve just unboxed your brand-new neon wall art from Ztylist. It’s vibrant, it’s bold, and it’s about to become the soul of your room. But then you look at your pristine walls and think: "Do I really need to drill holes?"
The answer is a loud, glowing NO! 💡
Welcome to Day 1 of our 15-part FAQ series where we tackle everything you need to know about LED neon signs. Today, we are conquering the "Mounting Fear." We’re going to show you how to get that custom glow up on your wall in under five minutes: without a single scratch or hole.
Whether you are decorating a rental, setting up neon signs for bedroom vibes, or just hate DIY projects, this guide is for you. Let’s get glowing!
WHY DAMAGE-FREE MOUNTING IS A GAME CHANGER
For many of us, the home is a canvas, but it’s a canvas we might not own. Renters, we see you! You want the style without the security deposit drama. Even if you own your home, you might want the flexibility to move your neon wall art whenever the mood strikes.
Traditional glass neon was heavy, fragile, and required professional installation. But Ztylist uses modern LED neon flex. It’s lightweight, durable, and shatter-resistant. This means you don’t need heavy-duty anchors for most of our signs. You just need a clever plan and five minutes.
https://ztylist.shop/collections/home-sign

THE 5-MINUTE TOOLKIT: WHAT YOU NEED
Before we start the clock, let’s gather our essential supplies. For a damage-free hang, you aren’t looking for a hammer. You’re looking for adhesive technology.
- Your Ztylist Neon Sign: The star of the show.
- Heavy-Duty Adhesive Strips: Look for strips rated for at least 5-10 lbs (though our signs are often much lighter!).
- Alcohol Wipes or a Damp Cloth: To ensure a clean surface.
- A Pencil: For light, erasable marks.
- A Level (or a leveling app on your phone): Because nobody likes a crooked glow.
If you prefer the classic look and don't mind a tiny hole, our signs come with pre-drilled holes for screws. But today, we are all about that no-drill life!

STEP 1: PREP THE SURFACE (1 MINUTE)
You can’t build a masterpiece on a dusty foundation. The biggest reason adhesive strips fail is because of hidden dust or oils on the wall. 🧼
Take your cloth or alcohol wipe and give the area a quick scrub. This ensures the bond is strong and permanent until you decide otherwise. Wait about 30 seconds for it to dry completely. While you wait, browse our FAQ page for more quick tips on maintenance!
STEP 2: PLAN THE PLACEMENT (1 MINUTE)
Hold your neon wall art up to the wall. If you’re setting up neon signs for bedroom decor, usually centered above the bed or desk works best.
PRO TIP: Plug the sign in while you're holding it! Seeing the glow against your wall color helps you find the perfect height. Once you're happy, use your pencil to mark the top corners or the pre-drilled hole locations on the acrylic backing.
STEP 3: APPLY THE ADHESIVE (2 MINUTES)
Grab your adhesive strips. Peel the backing and stick them to the smooth acrylic backboard of your Ztylist sign.
- Distribute the weight: Place strips at the top, middle, and bottom.
- The 30-Second Rule: Once the strips are on the sign, press it firmly against the wall where you made your marks. Hold it with steady pressure for at least 30 seconds. This activates the adhesive.

STEP 4: POWER UP AND HIDE THE WIRES (1 MINUTE)
The sign is up! Now, let’s make it look professional. Connect the transparent cable to the power adapter. 🔌
To keep things looking sleek, you can use small, clear adhesive clips to guide the wire down the corner of the wall or behind furniture. This keeps the focus on your vibrant art and off the hardware.
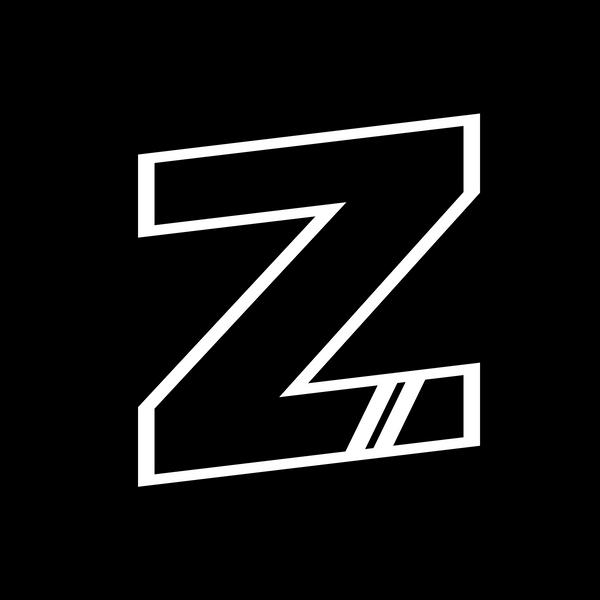
Check out how a simple "Z" sign can change a whole room:

BUT WHAT IF MY SIGN IS HUGE?
If you’ve gone big with something like our Route 66 highway LED neon sign, you might want a more permanent solution. For our larger, heavier pieces, we recommend using the included wall mounting kit.
- Hold the sign and mark the drill holes.
- Drill small pilot holes.
- Insert the anchors and screw in the standoffs.
- Mount the sign and tighten the caps.
It takes a few extra minutes, but it ensures your investment is secure, safe, and stunning.
FAQS: MOUNTING YOUR ZTYLIST NEON
Q: Can I hang my sign on wallpaper?
A: We don't recommend using adhesive strips on delicate wallpaper as it might tear during removal. For wallpapered walls, use the screw mounting method or hang the sign from a picture rail.
Q: Are Ztylist signs heavy?
A: Not at all! Our neon wall art is made with lightweight acrylic and LED flex. Most medium-sized signs weigh less than a standard framed photo.
Q: Can I hang my sign outside?
A: Only if you purchased a sign from our Outdoor Sign collection. These are specially sealed to handle the elements. Standard indoor signs should stay high and dry!
Q: How do I remove the adhesive strips?
A: Pull the tab slowly, parallel to the wall. This stretches the strip and releases the bond without taking the paint with it. Safe, simple, and clean! 🧼
MAKE IT YOUR OWN
At Ztylist, we believe your home should reflect your personality. Whether you want a quote that inspires you or a piece of pop culture that makes you smile, we have the quality you deserve.
Need something specific? You can upload a design or make your own sign using our interactive builder. Choose your font, pick your vibrant color, and we’ll handle the rest.
THE ZTYLIST PROMISE: BOLD, BRIGHT, AND BUILT TO LAST
When you shop with Ztylist, you aren't just getting a light. You're getting a piece of modern art. Our signs are:
- Energy Efficient: Low power consumption, high impact.
- Safe to Touch: No heat, no glass, no worries.
- Long Lasting: Designed to glow for over 50,000 hours.
We offer fast shipping and dedicated support to ensure your experience is as bright as our signs. If you ever run into trouble with your installation, just head to our contact page and our team will help you out! 📞

READY TO GLOW?
Hanging your neon wall art is the final step in claiming your space. It’s the difference between a room that’s "fine" and a room that’s iconic. Don't let the fear of installation hold you back. Grab some adhesive strips, pick your favorite spot, and flip the switch.
Explore our full range of Indoor Signs today and find the piece that speaks to you. Your walls are waiting for their glow-up! ✨✨✨
STAY TUNED for Day 2 of our FAQ series, where we’ll dive deep into how to choose the perfect color for your neon signs for bedroom!
SHOP THE FULL COLLECTION AT ZTYLIST.SHOP 🛍️